Eight days: see more by driving less
I paused in the Christchurch airport carpark with the keys in my hand, watching the clock tick toward 4:30 p.m. The “quick” idea of grabbing a bite in town and still reaching Lake Tekapo sounded fine until I remembered winter darkness (and tired left-side driving) arrives early. That moment was the first hint that eight days isn’t short—it’s just unforgiving if you treat the map like a checklist.
If you’re choosing between a North+South split or South-only, the trade-off is blunt: splitting buys variety but costs you at least one day to flights, pickup/return logistics, and re-learning your rhythm. South-only is less “two-islands brag,” more actual time outside the windshield—especially if you keep to a simple loop instead of ping-ponging. It works best for couples who want big scenery plus one or two serious hikes; it’s worse for anyone who’ll feel annoyed skipping Rotorua/Tongariro and then rushing Fiordland anyway.
Driving less isn’t about being lazy; it’s about protecting the usable hours in a day. Long transfers (say, pushing Christchurch to Queenstown in one go) look efficient, but they steal the flexibility you need for weather windows, trail conditions, and those slow road stretches behind tour buses. A loose loop—Christchurch to Tekapo/Aoraki, down to a Queenstown base, then back via the West Coast—usually gives you cleaner timing, fewer “arrive exhausted” nights, and fewer paid add-ons you’re too tired to enjoy.
Set your pace before booking anything
At 7:12 p.m. in Tekapo, I hovered over a “book now” button for a Milford Sound cruise, thumb stuck as the wind started slapping the campervan door. It wasn’t the price that stalled me—it was the timing: a 5 a.m. departure after a big drive day feels heroic on a map and miserable in your knees. Even the calendar looked crowded once I penciled in basic life stuff like grocery stops and a half-hour to de-ice the windscreen.
Before you reserve tours, decide what your trip is actually optimized for: standout hikes or maximal coverage. If you want one long hike day (Hooker Valley plus a side track, or a Queenstown day hike), plan for a “short drive + early bed” the night before; pairing it with a 3–4 hour transfer is the trade-off that quietly breaks people. A South-only loop works for mid-budget couples who’d rather spend money on one great experience than stack three rushed ones; a North+South split only works if you’re comfortable treating at least two days as transit.
Booking-wise, lock in anything that’s capacity-limited and weather-sensitive (Milford cruise, a key lodge night if you’re hiking) and leave the “nice-to-haves” loose. The limitation with prepaying everything is you lose the ability to swap days when rain parks itself over Aoraki or the road to the coast crawls behind tour buses. If you’re arguing at dinner about whether you “should” be driving, that’s usually your pace telling you the answer.
Days 1–3: Christchurch, Tekapo, Aoraki
The GPS told me Lake Tekapo was “under three hours” from Christchurch, and I almost believed it until I hit late-afternoon roadworks south of Rolleston and watched a neat ETA start sliding. By the time I’d grabbed groceries and figured out where the campervan dump station actually was, the light was already thinning. That’s the moment I’d steer you toward: treat Day 1 as a settling-in transfer, not a sightseeing victory lap.
Day 1: land, pick up the car/campervan, and aim for Tekapo only if you’re on the road by mid-afternoon; otherwise sleep Christchurch and leave early. Tekapo works best as a “two-nights-in-one-bed” stop if you want a calm night-sky window, but it’s a compromise: you’ll pay a little more for lakeside convenience and still need to be disciplined about dinner timing because everything feels slower after dark. If you’re arriving in winter, plan for limited daylight and cold starts—morning pack-down takes longer than you think.
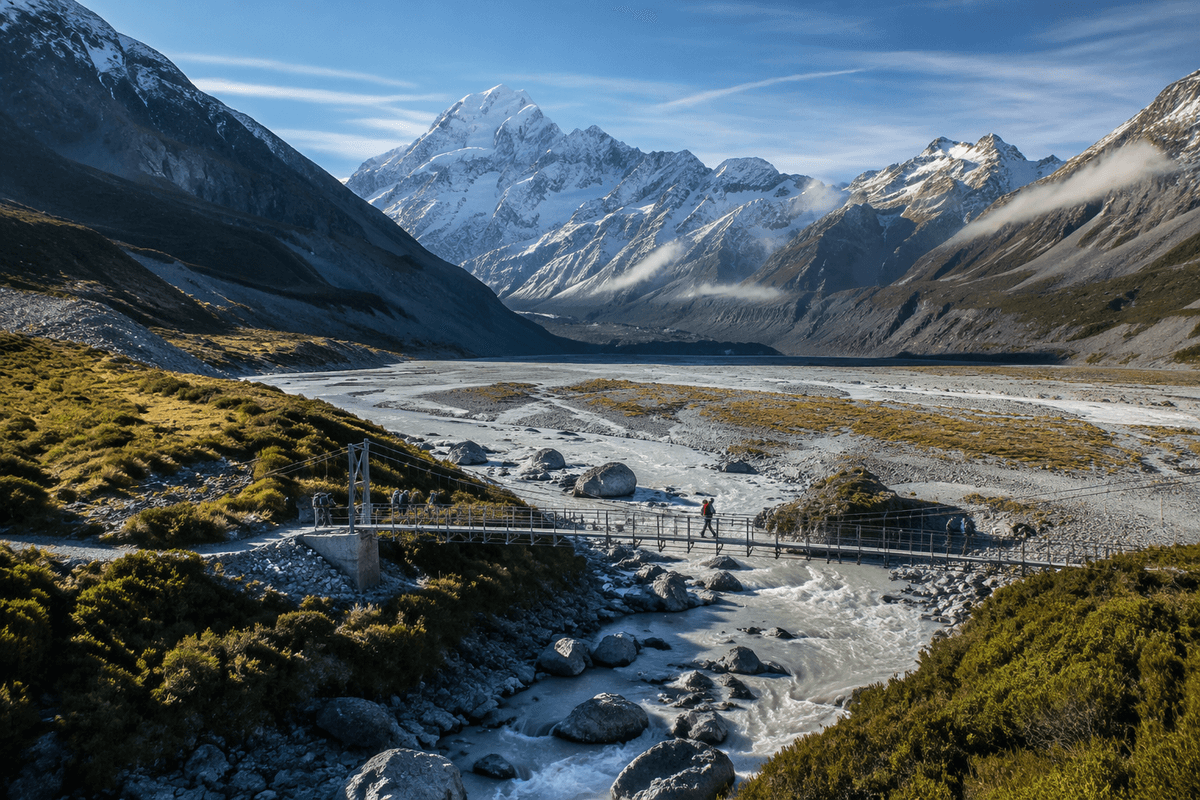
Day 2: Tekapo to Aoraki/Mt Cook Village is an easy-feeling drive, which is exactly why it’s dangerous to overfill the day. Hooker Valley Track is the obvious pick because it’s high-reward for the effort, but it’s not empty—start earlier to avoid the clumped crowd flow on the swing bridges. Day 3: keep a weather buffer: do Tasman Glacier View, a short lakeside walk, or just linger, then drive back toward Tekapo or continue south depending on cloud. If the forecast is messy, this is where flexibility beats a prepaid “must-do” add-on.
Days 4–6: Queenstown base, Milford day
At 5:38 a.m. in Queenstown, I stood in the half-lit carpark with a coffee that was still too hot to drink, watching headlamps shuffle toward vans marked “Milford.” The dashboard said the drive was “only” a few hours, but that number assumes no photo stops, no roadworks, and no “wait, are we actually hungry?” detours. In a campervan, even finding a tidy place to repack layers can chew up the calm you thought you’d banked.
Day 4: treat the Tekapo/Aoraki to Queenstown leg as a transfer with one or two controlled stops, not a full highlight reel. Queenstown works as a base because you can choose effort levels—lakeside strolls and a gondola day feel restorative compared with bouncing towns nightly—but the trade-off is cost and crowd flow (restaurants and parking get annoying fast). If you’re mid-budget, Glenorchy is the prettier “evening drive” than Arrowtown, but it doesn’t work if you’re already running late and daylight is thin.
Day 5 (Milford day): book the cruise ahead, then decide whether you’re driving yourself or taking a coach based on your fatigue tolerance. Self-drive buys you stop freedom (Mirror Lakes, short boardwalks), yet it’s a long, focus-heavy day that doesn’t pair well with a big hike afterward. Day 6: keep Queenstown as a buffer—Ben Lomond or Queenstown Hill if weather’s stable, or a slower day if rain settles in—because Fiordland’s timing rarely obeys your outline.
Days 7–8: West Coast back to Christchurch
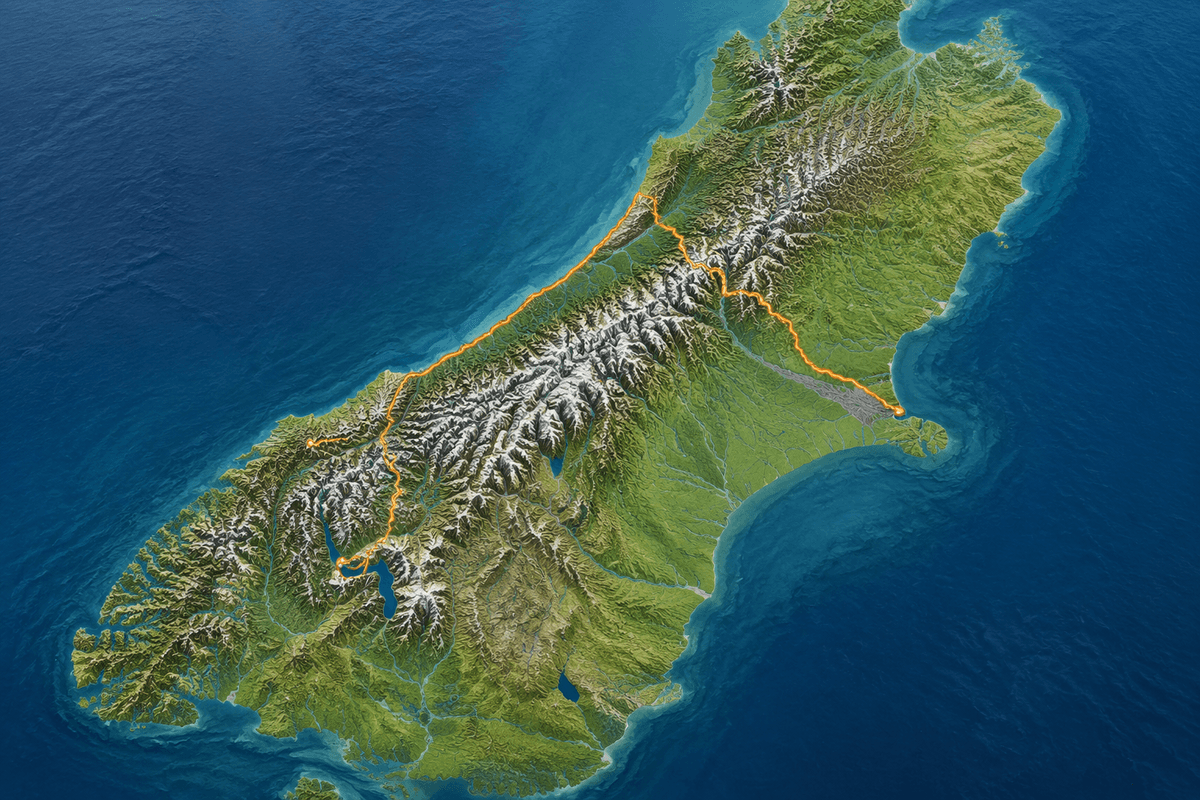
On Day 7, I watched the blue line on the map glide from Queenstown to the West Coast like it was nothing, then hit the first stretch of Haast Pass where the rain turned sideways and every “quick stop” meant wet layers and fogged windows. A coffee break in Wanaka felt optional on paper; in real life it was the difference between arriving cooked or arriving curious. Even the photo pull-offs have a cost when daylight’s fading and you still need groceries.
Day 7: go Queenstown (or Wanaka) → Haast → Fox or Franz Josef and accept that this is a driving day with scenery, not a hiking day with a drive attached. The trade-off is simple: you get the wild coast without backtracking, but you’re committing to one-night stops where accommodation can be limited and dinner options thin if you roll in late. If you’ve been pushing hard all week, this leg punishes overconfidence more than Milford did.
Day 8: head north early and choose your finish based on tolerance—Hokitika/Greymouth to Christchurch via Arthur’s Pass is doable, but it’s not a “lingering breakfast” day. Add one short, high-reward stop (Hokitika Gorge or a beach walk) and skip the temptation to stack viewpoints; the road is slower than it looks, and fatigue compounds. If this sounds tight, stay a final night nearer Arthur’s Pass and return to Christchurch the next morning—you’ll lose bragging rights, gain calm.
What I’d change for your trip
I changed a booking from the Fox Glacier side with my phone balanced on the campervan dash, because the only place with signal was a windy turnout where the rain kept tapping the screen. The cancellation window was closing, and I could feel that familiar pressure: either lock the plan and hope, or eat a fee and buy breathing room. That’s the kind of “tiny” friction that makes an eight-day outline feel harsher than it needs to.
If I were tuning this for a mid-budget couple, I’d build one more true two-night base and one fewer one-night scramble. Concretely: either (a) keep Queenstown at three nights and accept the West Coast as a long, scenic transfer rather than a hike zone, or (b) keep the coast but add a night near Arthur’s Pass so Day 8 isn’t a white-knuckle push back to Christchurch. The trade-off is cost versus calm: you’ll pay more for an extra base night, but you’ll stop spending on last-minute “we’re too tired, let’s just eat out” decisions.
I’d also choose one “hero” day—Milford or a big hike—and protect it with an early night and a lighter drive the day before; stacking it on top of a transfer works on paper and fails in your legs. If you’re still tempted to split North + South, do it only if you’re genuinely okay with two transit-heavy days; otherwise, commit to South-only and let the spare hours become weather insurance. Pick the version that lets you arrive somewhere with enough daylight to actually walk around.